
Most practices still have one form that never got digitized. It lives as a paper master in a drawer, gets photocopied a stack at a time, and comes back filled in by hand for someone to retype later. The form works. Nobody wants to rebuild it in a form designer, pay for another subscription, or send a clinic’s intake questions through a web tool to do it.
You do not need any of that. If you have the PDF, or even just the paper copy and an iPad, you can convert it into a fillable, reusable template once and never retype it again. The whole thing happens on the device. No desktop, no account, no login.
The exemplar for collecting a signed form offline covers the signing day. This one is about the step before it: turning the form you already use into a template that is ready when the client sits down.
Start from what you already have
There are two ways in, depending on what you are holding.
If you have the digital PDF, the form you email out or print from, that is the clean path. Import it straight from the Files app, an email attachment, or your cloud storage.
If all you have is the paper master, scan it first. Both iPhone and iPad have a document scanner built into the Notes and Files apps: open Notes, tap the camera, choose Scan Documents, and it captures the page, straightens it, and saves a PDF. A flatbed scan or a clean photo exported as PDF works too. The thing to get right here is the capture: shoot it square, in even light, with the whole page in frame. A skewed or shadowed scan makes every later step harder, because you are placing fields against a crooked page.
Either way, you end up with a PDF on the device. Import it into InPersonForms and you are looking at your actual form, not a rebuilt approximation of it.
Let detection do the obvious part
Before placing anything by hand, run field detection. What it finds depends on where your PDF came from.
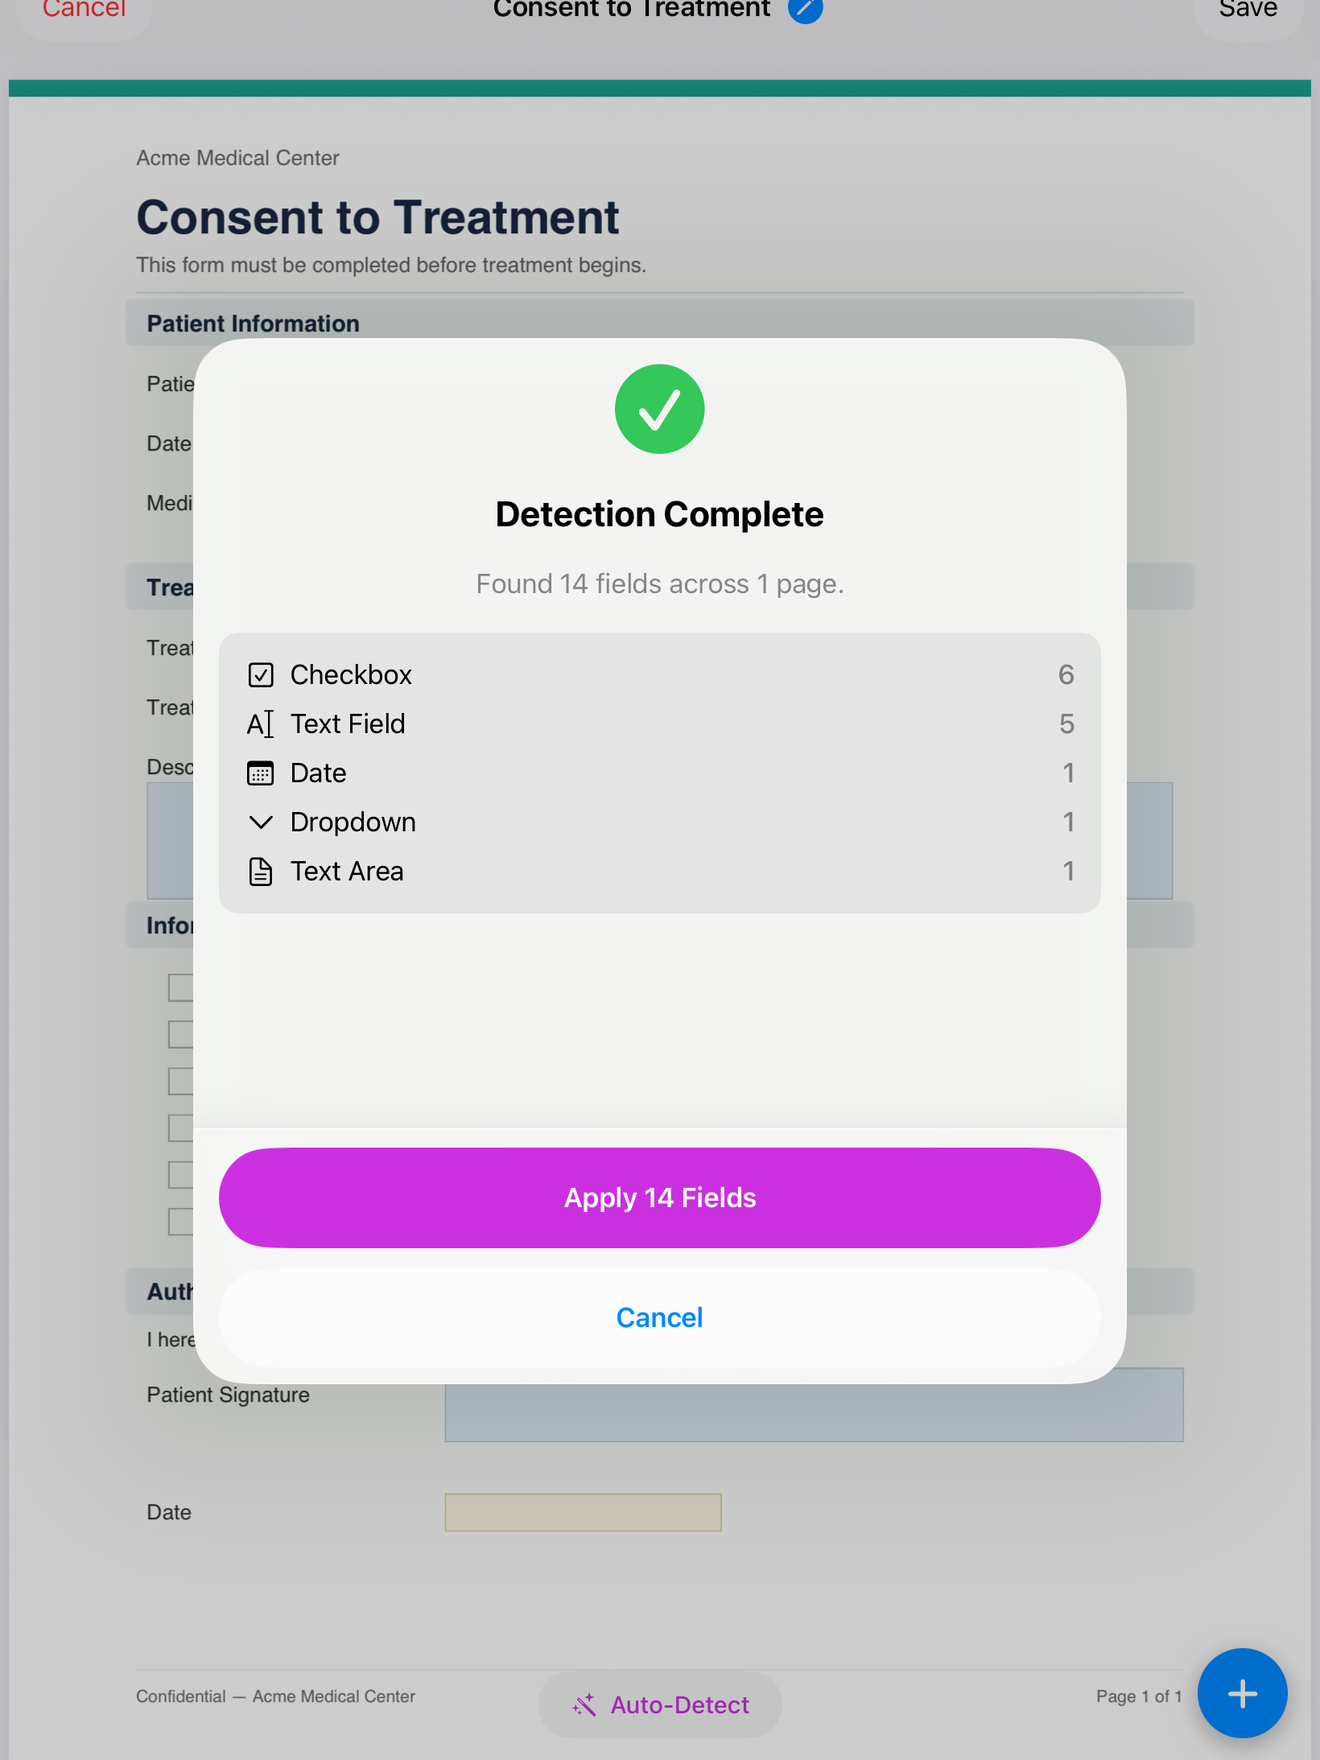
A PDF built in Acrobat, Word, or a similar tool usually carries embedded form fields inside it, even if they look like plain boxes on screen. Detection converts those in one pass: text inputs, checkboxes, radio buttons, dropdowns, and signature blocks get mapped and dropped exactly where they sit on the page. For a form that started life digital, this can place most of the work for you.
A scanned paper form is flat. There are no embedded widgets to convert, so detection has less to grab. It can still pick up checkbox and radio symbols and some underlines, but the text and signature areas will mostly be yours to place. That is expected, not a failure of the scan. Either way you review everything detection proposes before confirming it, so a stray box gets deleted rather than baked in.
Place the rest by hand, once
Now fill the gaps. This is the part that pays off, because you only do it one time.
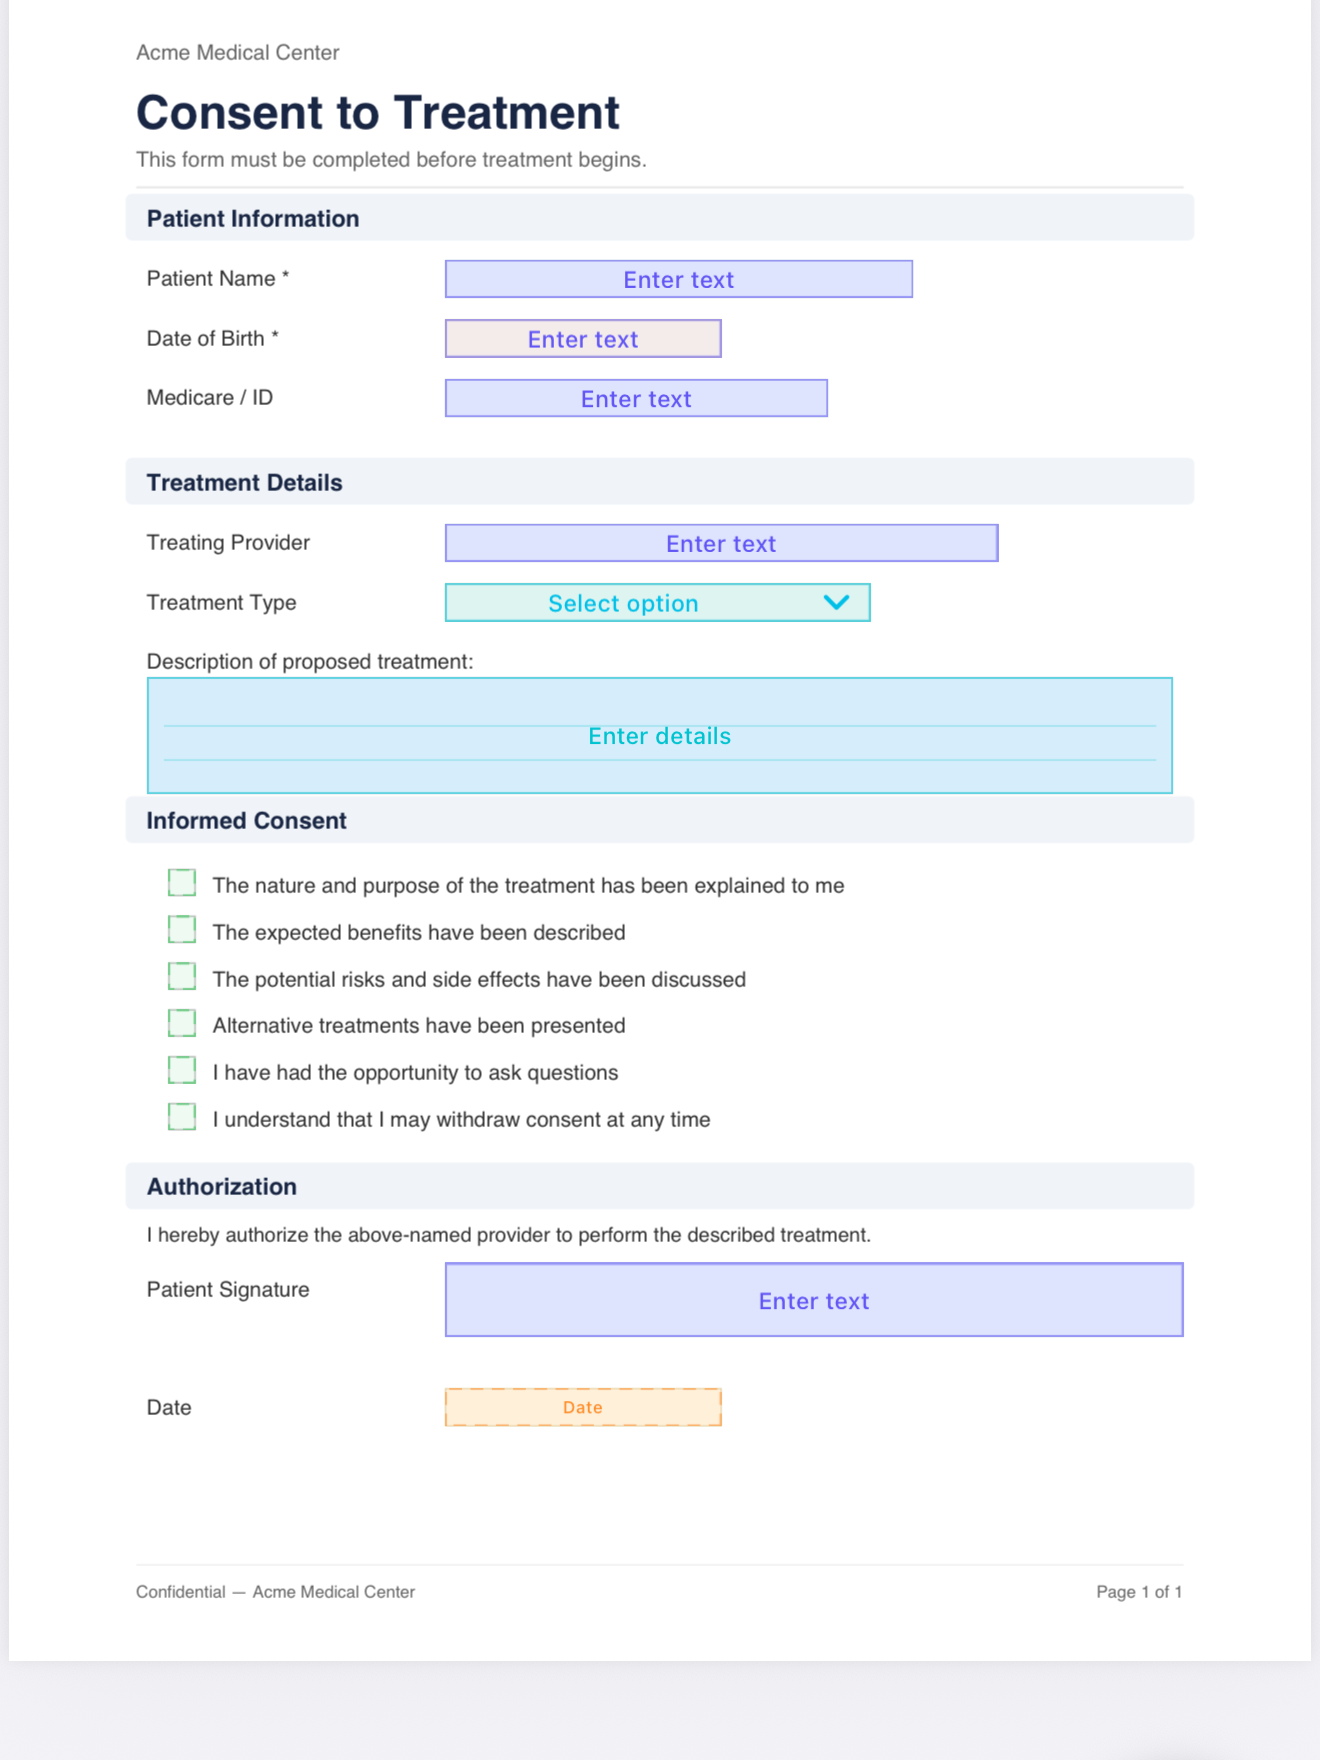
Work down the page the way a person reads it. Drop a text field on each blank line: name, date of birth, address, the open questions. Put a date field where a date goes so it gets a proper picker instead of free text. Add a checkbox or a radio group next to each option, and a dropdown where there is a fixed list to choose from. Leave a signature field at the bottom, and an initials field anywhere the form asks people to initial.
A few details worth getting right while you are here:
- Size the field to the space. Match the box to the line on the page so the client’s answer lands where a reader expects it, not floating above the line.
- Mark the must-haves mandatory. Any field flagged mandatory has to be filled before the form can be saved, which is how you stop a consent line or a signature from being skipped in the moment.
- Set the fields you already know to auto-fill. Today’s date and stored client details can drop in automatically, so the parts you can answer are answered before the client ever touches the screen.
Go slowly here once. Every client afterward inherits this layout exactly.
Save it as a template and reuse it
When the page looks right, save it as a template. That is the whole point of the exercise: the configured form is stored, and each new client opens a fresh copy of it. You are not editing the master each time or worrying about overwriting last week’s version. You open the template, the fields are already where you put them, and you fill it in with the person in front of you.
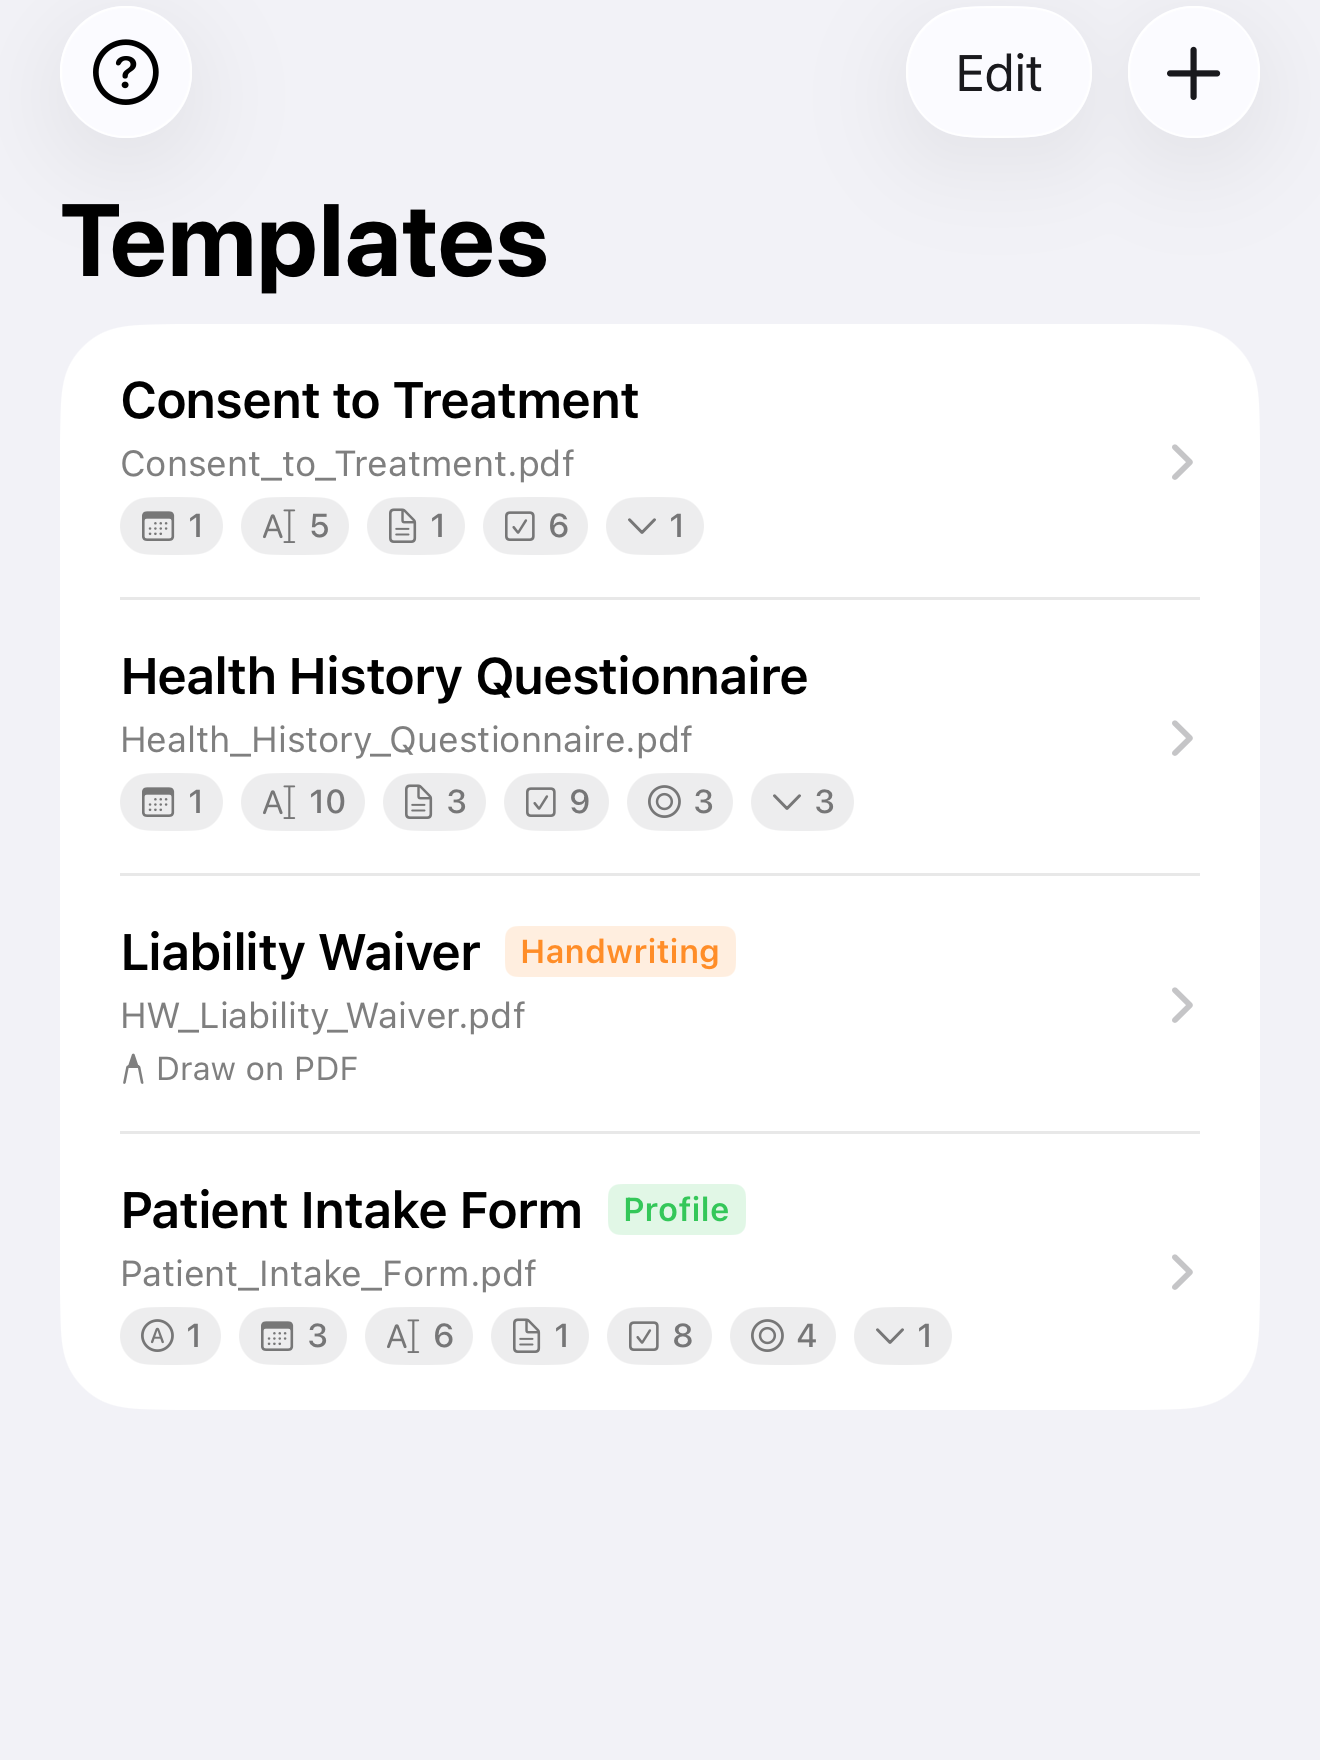
The free tier holds three templates with no time limit, which is enough to digitize your core intake, a consent form, and a waiver. If your practice runs more forms than that, the one-time Pro upgrade lifts the cap. There is no monthly fee tied to how many templates you build or how often you use them.
A quick sanity check before you rely on it
Before you put a new template in front of a real client, run one form through it yourself. Tab through every field, sign the signature box, and export the result. You are checking two things: that nothing important is unreachable or unmarked-mandatory, and that the exported PDF reads cleanly, with each answer sitting on the right line. Catching a misplaced box on a test run is free. Catching it after a client has signed is not.
That is the entire conversion: scan or import, let detection take the obvious fields, place the rest once, save the template. The form you already trust becomes one you can hand to anyone, on a device that needs no signal and no account to do it.
InPersonForms is on the App Store for iPhone and iPad.